Preview this look on your face in seconds with our AI hair designer app.


Face shapes: Oval • Heart • Round

Hair length: Medium • Long • Extra Long

Hair texture: Straight • Wavy • Curly • Fine • Thick

Difficulty: Medium

Time to style: 45-60 minutes

Works with: Cathedral veil • Fingertip veil • Blusher veil • Drop veil • Pearl accessories
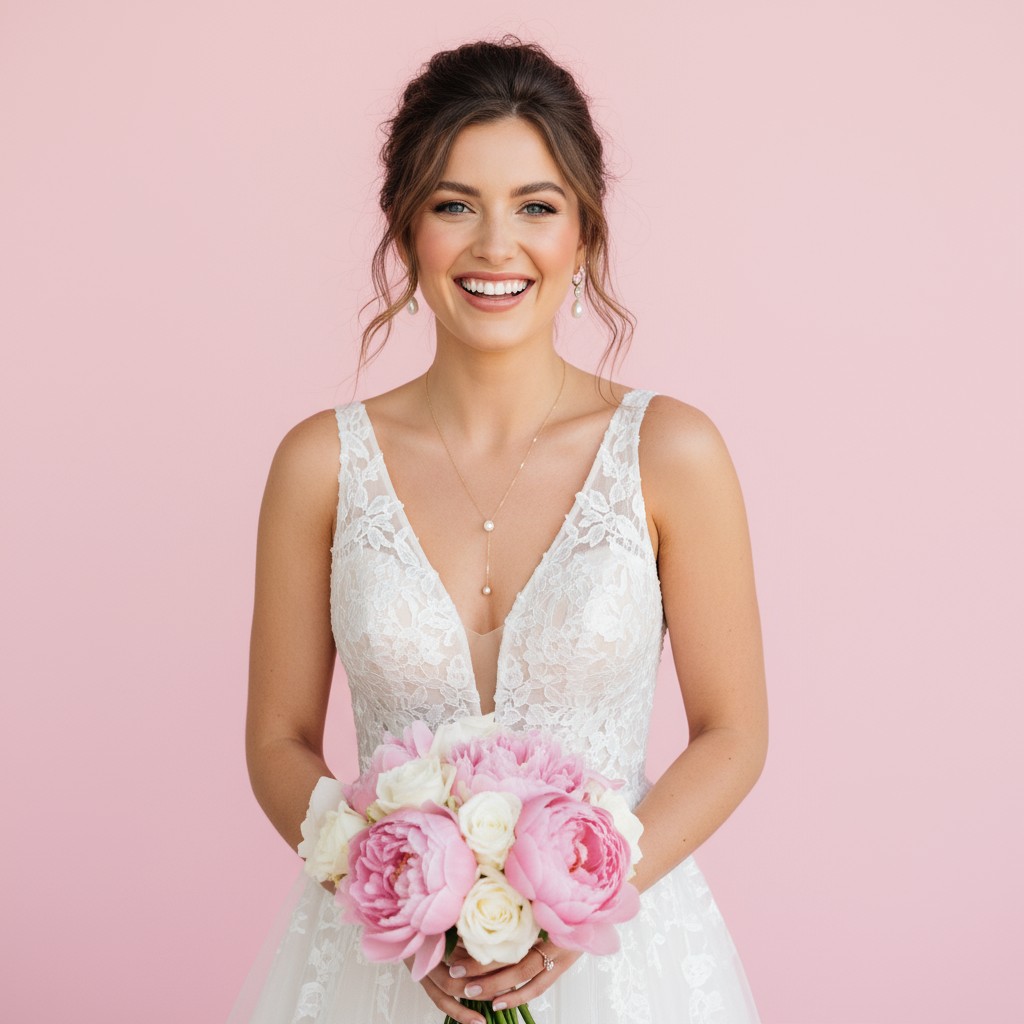
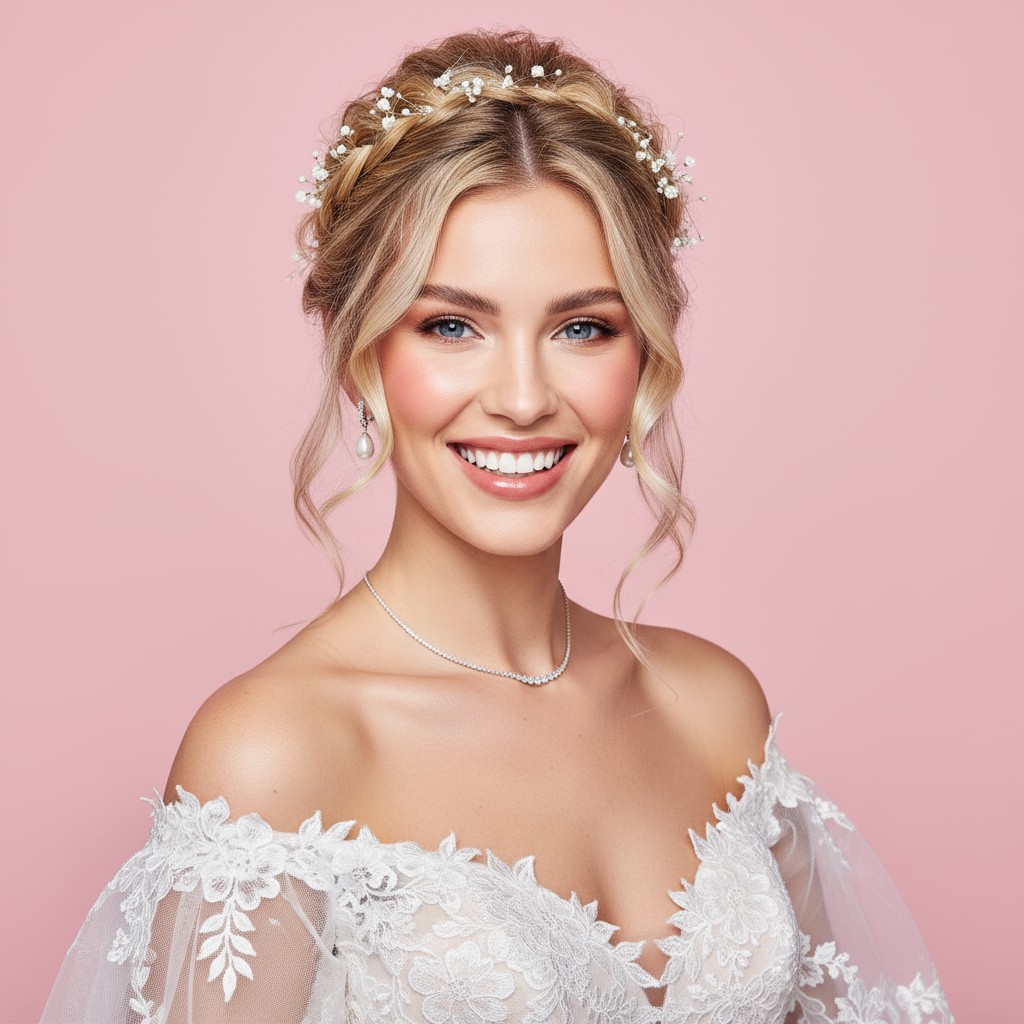
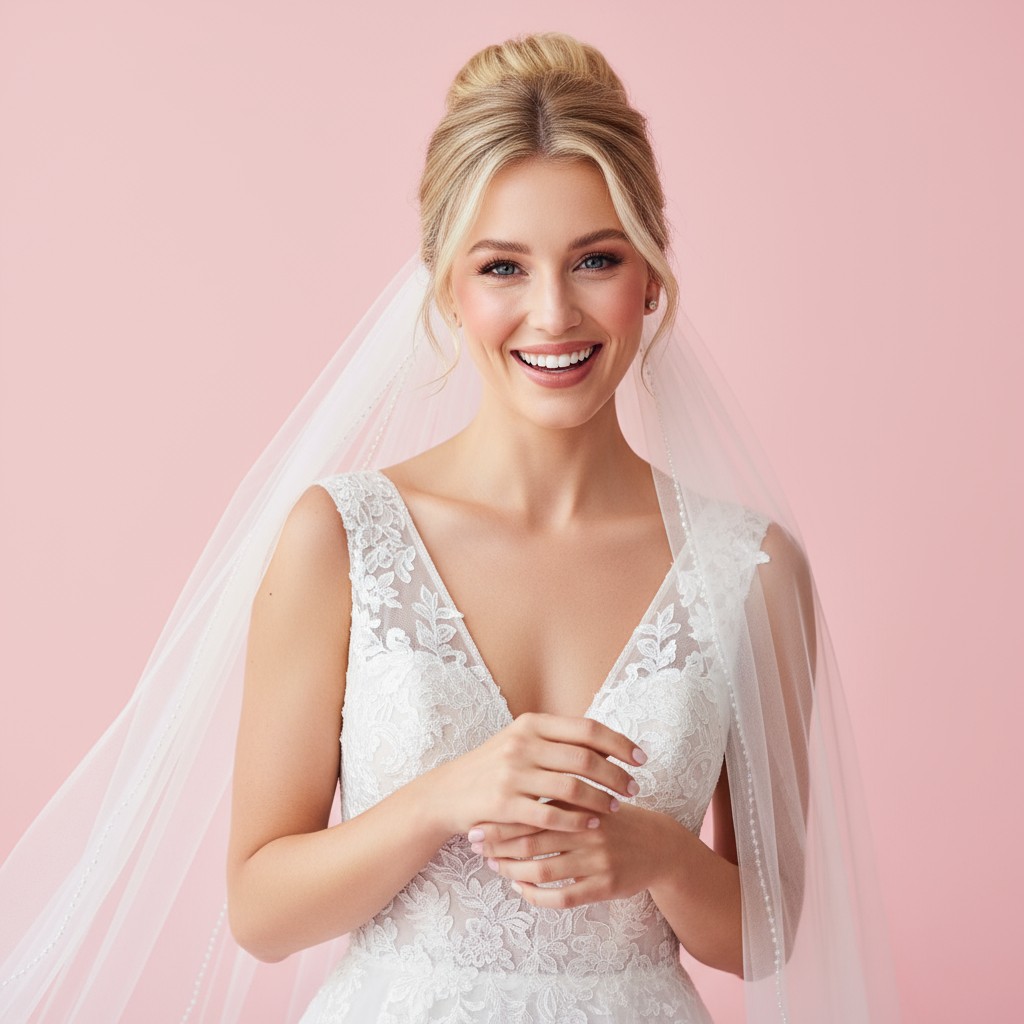
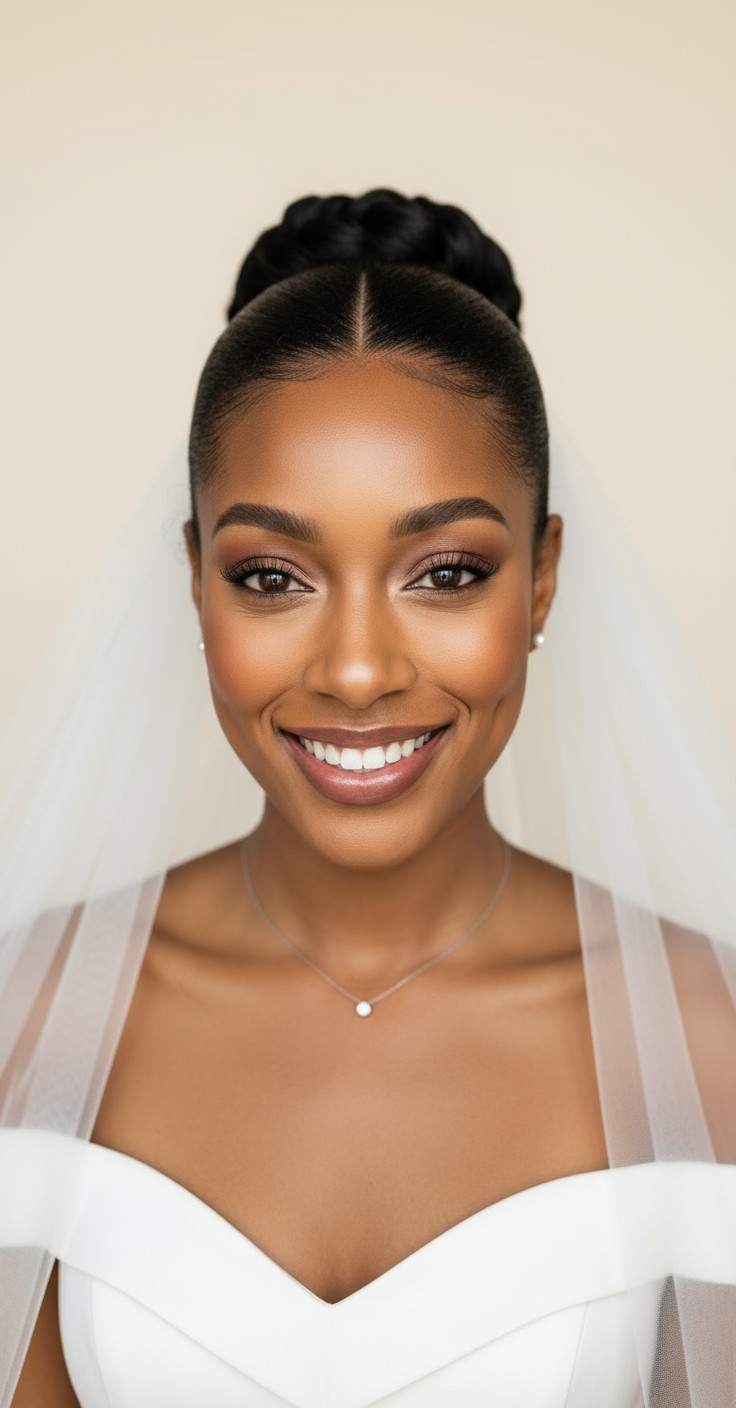
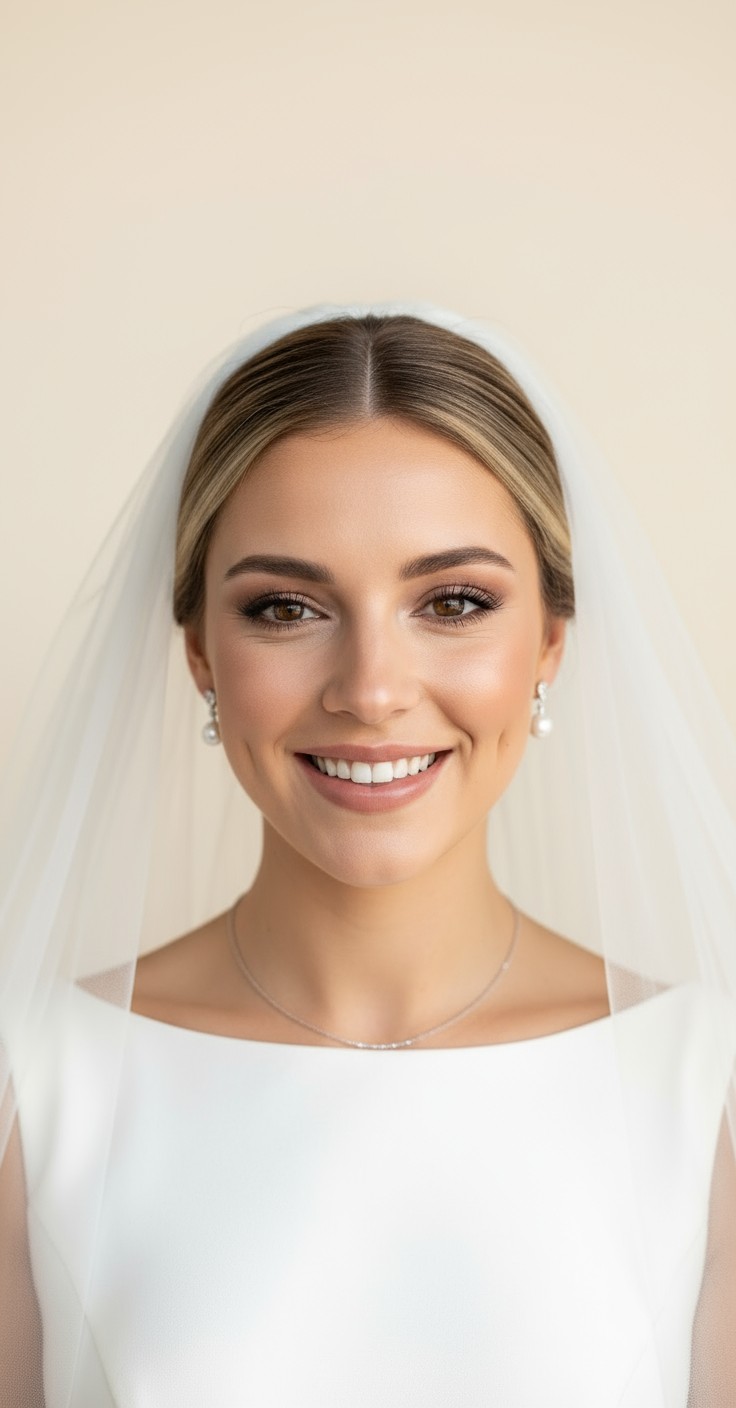
There's something magical about the way a classic bun frames your face and lets your veil cascade beautifully down your back. Brides choose this timeless style because it radiates elegance and sophistication while making them feel completely themselves—poised, confident, and ready for their forever moment. It's the kind of look that photographs gorgeously from every angle and never feels like you're trying too hard.
Beyond the romance, this style is incredibly practical for a long wedding day. The bun stays secure through hugs, dancing, and even unexpected weather, so you're not constantly checking your hair in photos. It creates the perfect anchor point for your veil, whether you choose a dramatic cathedral length or a soft blusher, and the sleek base means your veil sits exactly where it should without sliding or pulling.


Pearl-studded hairpins scattered throughout the bun
Vintage-inspired crystal hair comb placed at the base
Delicate floral hair vine wrapped around the bun
Art deco headband positioned above the bun
Minimalist gold bobby pins for understated shine
White spray roses or baby's breath tucked into bun folds
Silk ribbon wrapped around the base for texture
Cathedral or chapel veil attached just above the bun
Fingertip or elbow-length veil for softer, intimate ceremonies
Apply texturizing spray on dry hair before styling for grip and hold.
Use a donut bun form for extra volume that won't collapse.
Secure veil with U-shaped pins, not clips, for all-day stability.
Set finished style with flexible-hold hairspray to prevent stiffness while dancing.
Prep hair with volumizing mousse on damp hair, blow-dry smooth, then run a flat iron through for sleek texture.
Brush hair into a low or mid-height ponytail at your desired bun placement, securing tightly with a hair elastic.
Twist the ponytail around its base or use a bun donut for fullness, wrapping hair smoothly and tucking ends underneath.
Position veil comb just above or below the bun, pushing firmly into the base and securing with two U-pins crosswise.
Secure bun with bobby pins in an X-pattern, gently pull a few face-framing pieces, and mist with flexible hairspray.
Prefer instant?
Try 500+ hairstyles in minutes without
leaving home. See exactly how you'll
look on your big day.
✨ Try Before You Commit
Show your stylist clear visual
references. No more guessing or
miscommunication.
📱 Perfect Communication
Skip endless salon consultations
and trials. Find your perfect style
risk-free.
💰 Save Time & Money
Absolutely! Use a bun donut or padding for instant volume, and tease the ponytail lightly before wrapping. Texturizing spray also creates the illusion of thicker, fuller hair.
Yes—opt for a higher bun placement or add height at the crown to elongate your face. Leave soft, wispy pieces around your temples to create gentle framing.
Secure the veil with U-pins driven horizontally through the bun base, not just the comb. For heavy cathedral veils, add extra pins and consider a second anchor point.
If you're comfortable with updos and have a friend to help with veil placement, DIY works beautifully. For intricate styles or peace of mind on your big day, a stylist ensures perfection.